Introduction:
Draw The Statue Of Liberty: The Statue Of Liberty, a noticeable image of possibility and a majority rule government, stands tall on Open Door Island in New York Harbor, reliably inviting many guests. Drawing this great model can be a fantastic and fun imaginative undertaking. Whether you are a novice or a refined master, this bit-by-bit guide will walk you through drawing the Statue Of Liberty; truth be told and unhesitatingly. Like this, get your pencils, and let’s start! Also, check out free Turkey coloring pages.
Stage 1: Gather Your Specialty Supplies
Before we start, we promise you to have all the critical craftsmanship supplies. You’ll require the following:
- Drawing paper or sketchbook
- Makes plans for (ideally an H pencil for light portraying and a B pencil for extra dim lines)
- Eraser
- Ruler
- Compass or round object (discretionary)
- Reference picture of the Statue Of Liberty (you can see one as truly on the web)
Stage 2: Begin with Significant Shapes
Start by delicately portraying the key shapes that will go as the system for the Statue Of Liberty. Begin with an upward line in the mark of a combination of your paper to address the body’s fundamental turn. Then, draw a genuine circle on five stars to address the head and a more noteworthy oval under the line for the body.
Stage 3: Diagram the Head and Center
Counting the fundamental shapes as a partner, frame the head and focus of the Statue Of Liberty. The head ought to be an impalpably broadened circle, and the middle ought to be molded like a revised tear, extending at the base—endeavor to coordinate the raised arm and the light.
Stage 4: Sketch the Facial Elements
Eventually, we should zero in on the subtleties of the face. Attract two almond-formed eyes to the point of convergence of the head circle. Under the eyes, sketch a little nose, and a brief time frame later, draw a touchy bend for the mouth. The clarification should be calm and welcome. Add the crown to the head, including seven spikes keeping an eye on the seven oceans and breadths of land.
Stage 5: Draw the Hair and Crown Subtleties
Develop the hair from the sides of the crown and let it stream down the shoulders. The hair ought to be wavy and free-streaming. Add the crown subtleties by describing vertical cutoff points associated with the top spikes. These lines address the light outflows crown.
Stage 6: Diagram the Middle and Dress
Work on portraying the middle and the dress of the Statue Of Liberty. Utilize streaming lines to portray the robe wrap, which ought to be free and decision. Draw the arm holding the light, causing it to give off an impression of being broadened and slight.
Stage 7: Add the Light and Fire
In this step, attract the light of the Statue Of Liberty’s hand. The light should be round and void, and its fire should have a particular shape with wavy lines to show fire. Expecting nobody minds one way or the other, based on how the hand figures out the light, as it ought to look run of the mill and exact.
Stage 8: Sketch the Legs and Feet
Moving forward toward the lower piece of the body, sketch the legs and feet. The legs should be thin and long, and the feet should point forward. Add several overlays and wrinkles to the robe around the legs to make an impression of progress.
Stage 9: Draw the Base and Stage
Now that the model is finished draw the base and stage on which the Statue Of Liberty stands. The base should be rectangular, and the stage should have two or three planning subtleties like fragments or ornamentation.
Stage 10: Refine the Subtleties
With the principal parts set up, right now is the best entryway to refine the subtleties of the Statue Of Liberty drawing. Add more prominent importance and definition to the facial parts, hair, and robe folds. Utilize cross-agonizing or masking strategies to add shadows and components, making a three-layered difference.
Stage 11: Delete Rules
Prudently eradicate the fundamental light outlining lines and any inconsequential rules that are not generally required. Utilize a delicate touch to avoid spreading or harming the drawing.
Stage 12: Last Contacts and Outline
After your drawing, audit the subtleties and perform any significant enhancements. Examine the degrees, guarantee harmony, and add keep-going nuances to chip away at the outward show.
Stage 13: Stirring it up
Tolerating, you like to add tone to your drawing, utilize colored pencils, watercolors, or some other medium you feel okay with. Generally, the Statue Of Liberty is portrayed in green with a generous concealed light and crown. Regardless, you can explore different streets concerning assortments and make a striking portrayal whenever required.
End:
Drawing the Statue Of Liberty could have every one of the reserves of being attempting; however, with just the right amount of my little system and some readiness, you can put a dazzling portrayal of this on the map image of possibility. Try to show limitation toward yourself and permit your innovative abilities to empower after some time. Like this, feel free to release your imaginative brain as you set out on this innovative excursion to write the substance of the Statue Of Liberty down. Delighted drawing! For more information, please Click Here!
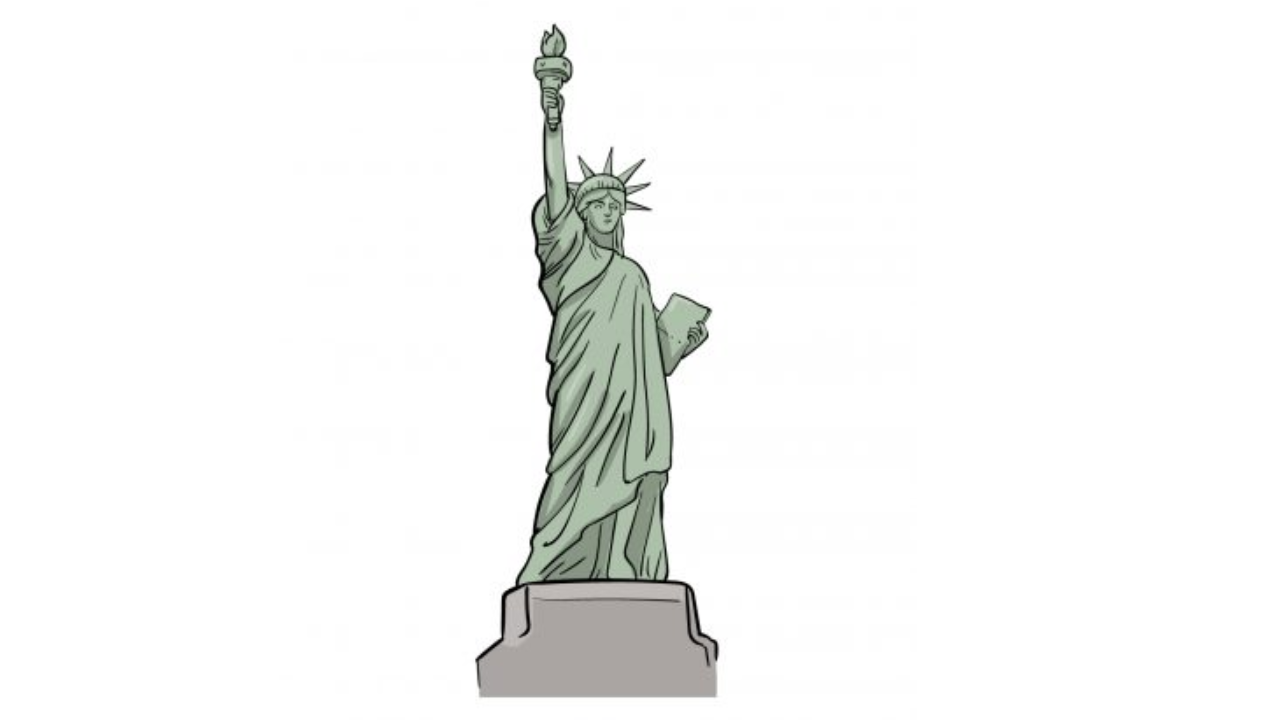
Your Sculpture of Freedom Drawing is Finished!
We trust that you delighted in making this notorious sculpture close by s in this aide on the most proficient method to draw the Sculpture of Freedom!
Also, We made this manual to show you how simple it tends to be to draw even a more definite picture like this when you know what to do.
We likewise made it a good time for you to utilize, so we trust it was charming and supportive!
Presently you can take this drawing much further by adding your subtleties like a decent foundation. We can hardly hold on to see how you polish off this picture!
At the point when you’re prepared for serious drawing fun, you can visit us on our site as we have lots of guides for you to appreciate! We transfer new ones all the time too, so make certain to visit the site frequently!
We couldn’t want anything more than to see your completed Sculpture of Freedom drawing, so kindly go ahead and share it on our Facebook and Pinterest pages for us to respect!