Artificial grass has quickly become the go-to choice for homeowners seeking a low-maintenance, year-round green space. It’s perfect for families, pet owners, and anyone tired of mowing and muddy patches. But before you roll out your new turf, one critical question arises: Do I need to prepare my garden before installing artificial grass Durham?
The answer is a firm yes — and here’s why. Preparing your garden correctly is essential to ensure that your artificial grass looks great, drains properly, and stands the test of time. In this guide, we’ll walk you through the importance of preparation, what’s involved, common mistakes, and whether it’s a DIY-friendly job or best left to the professionals.
Why Garden Preparation Is So Important
The installation of artificial grass might seem straightforward on the surface, but beneath that synthetic turf lies the real secret to a lasting, trouble-free lawn: the groundwork. Proper garden preparation ensures that:
-
Water drains efficiently through the base
-
The surface remains level, flat, and free from bumps
-
Weeds are kept at bay
-
The artificial grass doesn’t shift or ripple over time
Skipping preparation might save time in the short term, but it can lead to drainage problems, an uneven finish, or even full replacement within a few months.
Step-by-Step: How to Prepare Your Garden for Artificial Grass
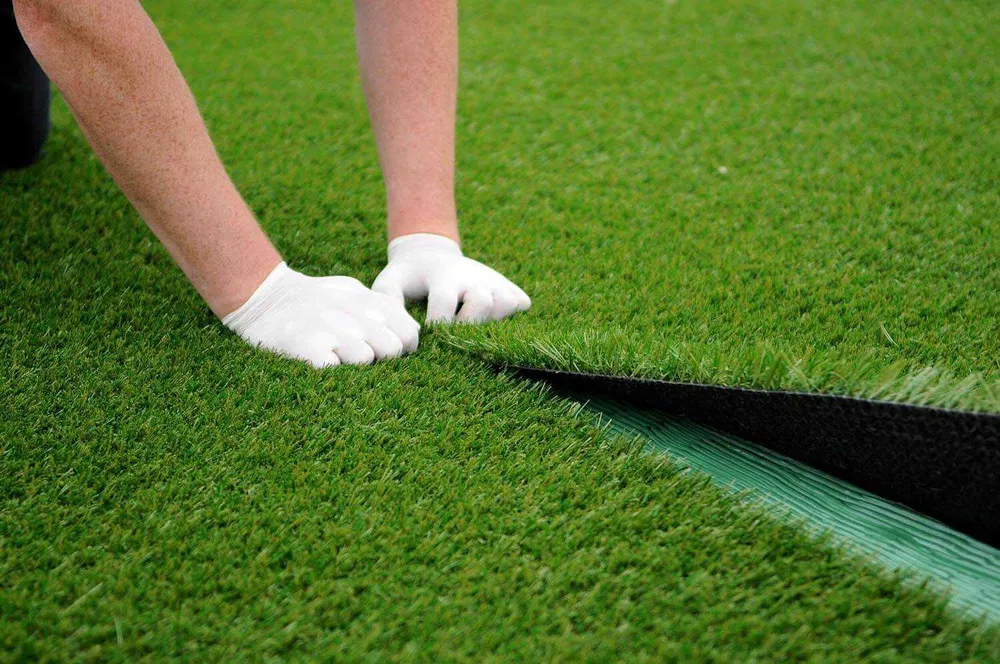
1. Remove Existing Grass and Vegetation
Start by clearing the area. Use a spade or turf cutter to remove grass, weeds, roots, and any debris. This gives you a clean slate for the base layers and prevents unwanted growth underneath your turf.
Tip: For larger gardens, renting a turf cutter can save hours of labour and ensure a more even removal.
2. Excavate the Soil
Next, dig down approximately 75mm to 100mm to allow space for the sub-base and grass backing. This depth allows for proper water flow and ensures your artificial lawn sits flush with existing paths or patios.
Don’t skip this step — laying turf on compacted or unlevel ground leads to wrinkles, pooling water, and poor durability.
3. Install a Weed Membrane
Lay a quality weed membrane across the excavated area. This layer blocks weed growth while allowing water to drain through freely. It’s particularly important in gardens where weeds are a persistent issue.
Avoid using cheap materials that can tear or restrict water flow — a breathable, geotextile membrane is ideal.
4. Build the Sub-Base Layer
This is the most critical stage of garden preparation. Your sub-base provides strength, structure, and drainage.
-
First Layer: Add a 50–70mm layer of MOT Type 1 crushed limestone or hardcore. Compact it using a vibrating plate compactor.
-
Second Layer: Top this with a 10–15mm layer of sharp sand or granite dust, and compact it again to create a smooth, stable surface.
Granite dust is preferred by many professionals for its better drainage and locking ability, especially in wetter climates.
5. Edge Restraints (Optional but Recommended)
Install timber, metal, or plastic edging around the perimeter of your lawn area. This prevents the base from spreading and the turf from lifting at the edges. It also provides a neat, defined border for your finished lawn.
6. Final Levelling and Compacting
Before laying the artificial grass, ensure the surface is completely flat, compacted, and slightly sloped away from your property to aid drainage. Use a spirit level and hand tamper to fine-tune any dips or bumps.
What Happens If You Skip Preparation?
Cutting corners at this stage might seem like a time-saver, but the consequences can be costly:
-
Weed growth through the turf
-
Standing water and poor drainage
-
Uneven surfaces, dips, and lumps
-
Shortened lifespan of your grass
-
Visible seams or edges lifting
If your artificial grass starts sagging or growing moss underneath due to poor groundwork, the only fix may be pulling it up and starting again.
Is DIY Garden Preparation Possible?
For smaller gardens or confident DIYers, yes — it’s doable. But it’s labour-intensive and requires the right tools (a turf cutter, compactor plate, wheelbarrow, and levelling equipment).
DIY installation may suit:
-
Balconies or patios
-
Small, square lawns
-
Temporary turf solutions
However, for larger areas, sloped gardens, or high-traffic zones, hiring professionals is usually the safer bet.
Benefits of Hiring a Professional Installer
At Landscapers Durham, we’ve installed countless artificial lawns across Durham and surrounding areas. Our professional service includes:
✅ Accurate excavation and base construction
✅ Weed-proofing with high-grade membranes
✅ Proper levelling and compaction for smooth results
✅ Expert turf fitting and secure edge fixing
✅ Disposal of old turf and clean-up
We also offer product and workmanship warranties, so you know your new lawn is in safe hands.
Common Mistakes to Avoid
-
Using only sand as a base (it shifts too easily)
-
Failing to compact each layer properly
-
Skipping the weed membrane
-
Laying turf in wet weather
-
Not allowing for drainage falls away from structures
Avoiding these mistakes ensures a professional finish, whether you’re laying the grass yourself or hiring help.
What Tools Do I Need to Prepare My Garden?
If you’re taking the DIY route, here’s a basic tool checklist:
-
Turf cutter or shovel
-
Rake and wheelbarrow
-
Compactor plate (wacker plate)
-
Spirit level and tamper
-
Weed membrane and pins
-
Edge restraints
-
Sharp sand or granite dust
-
MOT Type 1 base material
Don’t forget gloves, safety boots, and plenty of energy — groundwork is demanding!
How Much Does Garden Preparation Cost?
Preparation costs vary based on:
-
Garden size
-
Existing surface condition
-
Material costs in your area
-
Access for equipment
On average, groundwork preparation ranges from £10 to £15 per square metre. If you hire a company like Landscapers Durham, this is often included in your full installation quote.
Final Thoughts
So, do you need to prepare your garden before installing artificial grass? Absolutely. It’s not just a recommendation — it’s the foundation of a successful, long-lasting installation.
Whether you choose to do it yourself or trust the experts, proper garden preparation will:
-
Improve drainage
-
Extend the lifespan of your turf
-
Prevent surface problems
-
Enhance the look and feel of your new lawn
Don’t be tempted to cut corners. The extra effort or cost upfront will save you time, money, and frustration in the future.
FAQs: Preparing for Artificial Grass Installation
Do I need to prepare my garden even if it’s flat?
Yes. Even a flat surface needs a proper sub-base and weed membrane to ensure drainage and long-term durability.
Can I lay artificial grass directly on soil or grass?
No. Soil shifts and retains moisture, leading to poor drainage and uneven surfaces. Always excavate and build a stable base first.
How long does preparation take?
For an average-sized garden (30–50m²), preparation typically takes 1 to 2 days, depending on the ground conditions and access.
Do I need drainage under artificial grass?
Yes. Without proper drainage, water can pool under your turf, encouraging moss growth and damaging the sub-base.
Will I need planning permission to install artificial grass?
Not usually, but check with your local council if you live in a conservation area or a listed property.