What is the MERN Stack?
It’s a web development framework comprising the stacks of MongoDB, Express.js, React.js, and Nodejs. It is one of the many flavors of the MEAN stack.
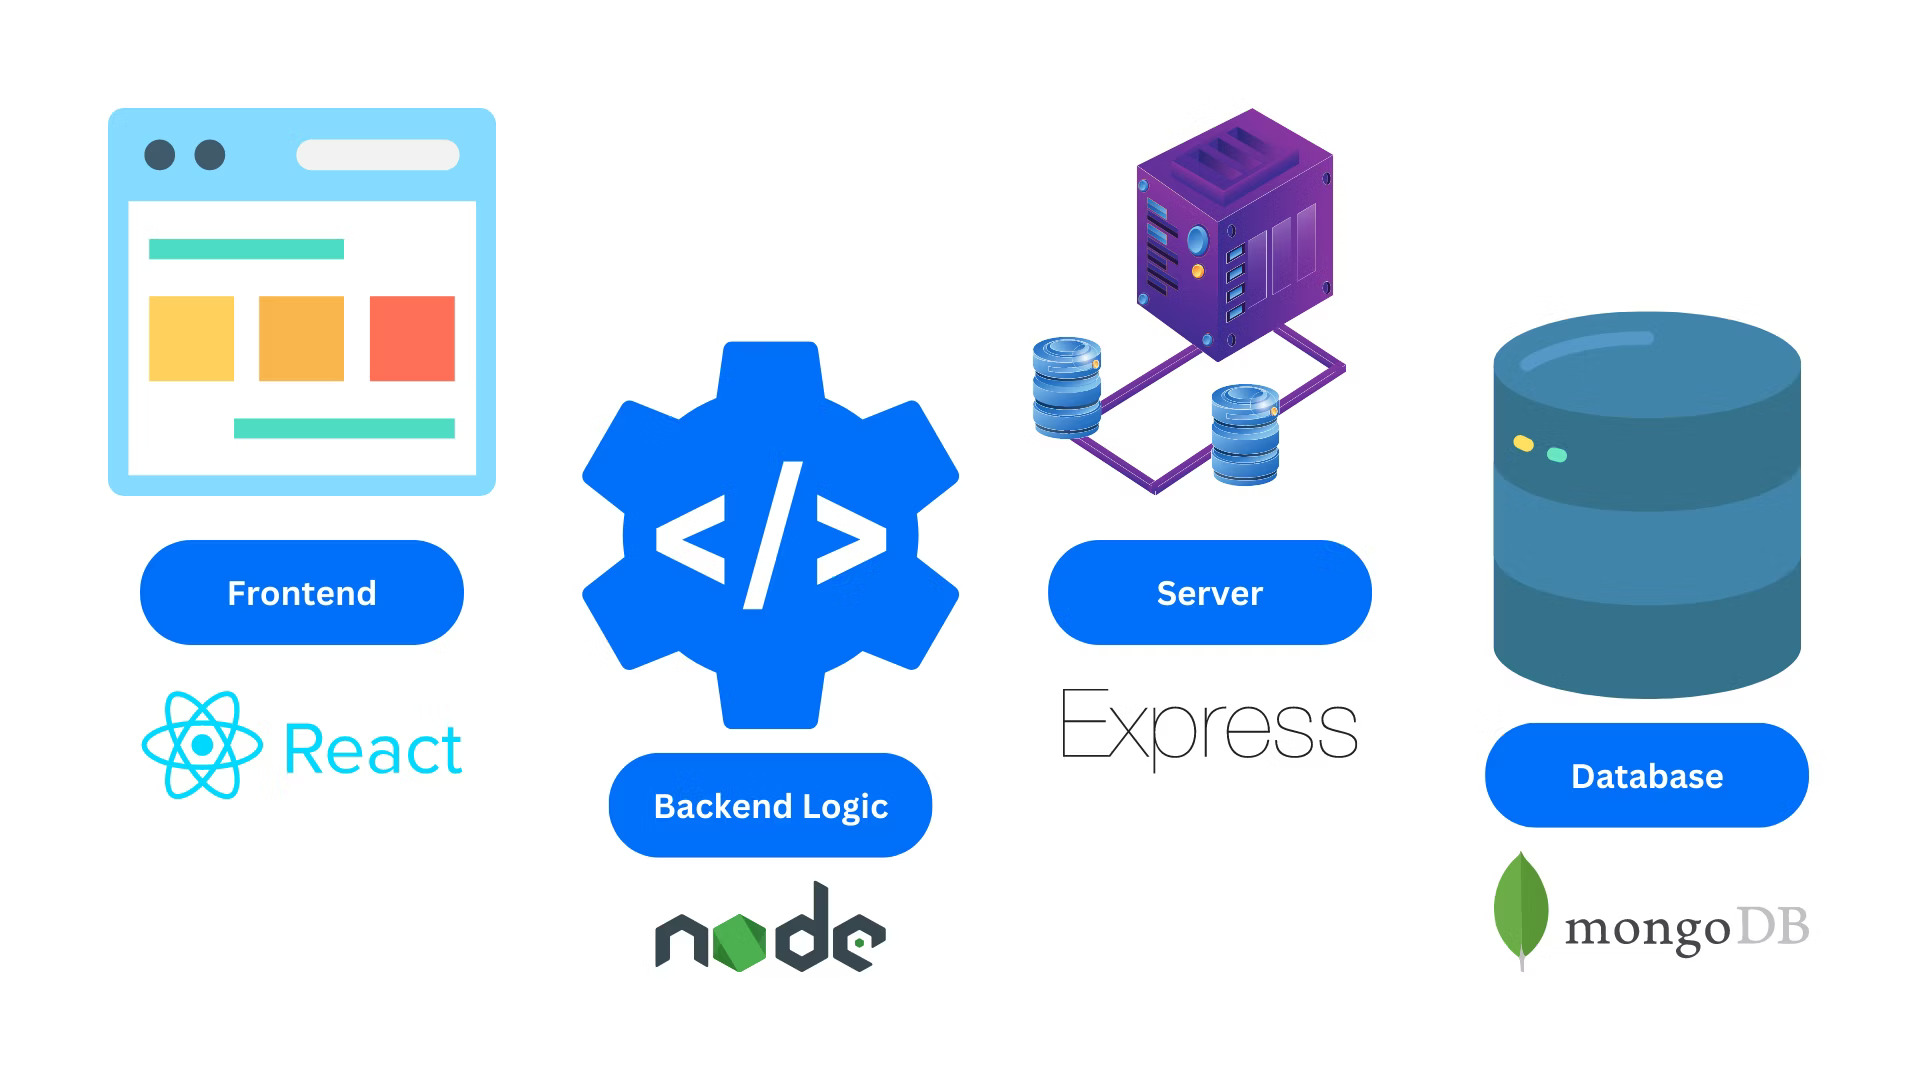
The presentation layer is achieved using React in a MERN stack. The middle, or application layer, will consist of Express and Node, while the database layer will be created by MongoDB.
This MERN stack tutorial shall use these four technological elements in developing an application whereby any details can be saved and displayed in React.
How to Get Started with the MERN Stack?
MERN enables us to build end-to-end solutions. Thus, for us to fully realize our MERN stack potential, we will be creating a project in the MERN stack. We will develop a back end and a front end for this project. Implementation of the front-end will be done with React and the back-end will be done using MongoDB, Node, and Express. We will designate the first end as a client (front end), while the second end is a server (back end).
To get started, you will need to do the following:
Step 1—Install Node
To install Node, go to https://nodejs.org/en/ and choose between or download the LTS version and the current version.
Step 2. Make a new node project
You now have to create a project folder for your Node project after installing both Node.js and MongoDB. Open a new terminal window, create a new Node project directory in any convenient location on your local machine, and switch to that directory by executing the following code:
Initialize a new Node.js project with the following code:
It will create a new package.json file. It will be a file containing data on what your application is all about and other details required for its functionality.
Install the dependencies:
The command above uses a couple of keywords:
- Nodule uses Express to install the web framework for Node. This will enable us to live more conveniently.
- Cors is the name of a Node.js package that facilitates cross-origin requests, among other things.
- dotenv is a package that enables the loading of the variables found in a.env file onto a process.env file. This makes it possible for configuring files to be distinct from code.
- json enables us to check for the existing dependencies. This must include the package name and version.
Step3. Developing Node.js Express Server
Start by creating a file called server.js type the following code into it and save it:
This is where the use of Express and Cors should be made explicit. We require a configuration environment file named config.env so that the const port process.env.port will access the port variable from it.
Just a suggestion – if you’re not tech-savvy and looking to create an eCommerce portal using the power of the MERN stack, better contact with experts offering custom eCommerce website development services.
Step 4: Installation of Mongoose and MongoDB
To make this guide simple, we will be using the MongoDB Atlas cloud-based database-as-a-service free tier that offers an easy approach to working with MongoDB. Your database will be connected using Mongoose which will act as the front end. It is an object modeling tool for MongoDB that should run in an asynchronous setting.
Like any other dependency, Mongoose can be installed within your node project by using amp. To install it, use the following command inside your project folder:
Now, run ‘npm install mongoose –save’ to add Mongoose and a MongoDB database driver to allow for interactions between the database and your Node.js app.
Step 5:Connecting to a MongoDB database
We are connecting our server to the database now. Open a terminal window inside your ‘server’ directory and execute the following command:
To do this, you will need to set a new ATLAS_URI variable in the config.env file, which should point to the connection string of your MongoDB Atlas database.
Connect with Atlas in the cluster. This will prompt the Cluster Connection Wizard. In case you do not have a Mongo DB user, Wizard will ask you to add your current IP address to the IP Access List and then create a Mongo DB user. However, you should keep a record of the username and password that you choose for the new MongoDB user, which you will require in subsequent steps.
The wizard will then prompt you to select a preferred mode of connectivity. Select Connect Your Application. At this point, when prompted by the Wizard, choose Node.js and 3.6 and above. Copy the provided connection string.
Your file should resemble the one below:
Note: Ensure that you use your database username and password instead of the username and password used here.
After that, you should make a new folder within the server directory and call it db.
Firstly, inside it, you need to develop the file conn.js. We will then need the above code to link it to our database.
Step 6: Server API Endpoints/Routes
Database done. Server done. Next, we move on to the Server API endpoints. We can begin by making an index folder and putting record.js in it. Navigate back to your “server” directory and create the new directory and file:
Paste the following code inside the routes/record.js folder:
Turn on your server and let us see how it goes. Open your terminal in the same directory as your server.js file and type:
And that concludes the back end. Let us now proceed with the front-end work.
Step 7: Develop a React app
To install your React application, execute the create-react-app command in your project’s root folder:
Your new React frontend app will go into a new directory. Go to the client file and examine our React app’s code.
Open a new terminal window in the “client” directory, and install two additional dependencies:
- Bootstrap will help you speed up template deployment as well as the coding of all components needed in your new web app.
- npm provides react-router-dumb as a package for react-router components in web apps.
Step 8—Configure react router
To set up the React Router, start by emptying the src folder:
Next, add two new files to it: index.js and App.js.
Inside the src/index.js file, add the following code:
For that purpose, we are using <BrowserRouter>. Its responsibility is to save the current location bar in each browser and keep our UI synchronized. It eases transitions while refreshing the components.
Step 9 – Creating the React Components
Place a component’s folder within the src directory. In the components directory, we will place a new.js file for every element that we create.
There are three things that the app needs to do:
– Create an employee
– Edit employees
– View all employees
We will generate create.js, edit.js, navbar.js, and recordList.js for each task.
Step 10—Testing
You are done building the parts. You also used fetch on your React app to connect it to the back end. Fetch has better ways of handling HTTP requests, which are cleaner than others. create.js, edit.js, and recordList.js have been using fetch for handling HTTP requests.
Close everything and start the app, using the following steps:
In a new terminal window, start by executing the following command in the ‘server‘directory:
Open a new terminal window in the client directory and run the following command:
The application should be able to load on your browser.
Wrapping Up
Lastly, MERN being a starter in itself offers the most current tools and components for creating modernized web apps for programmers in general. The combination of MongoDB, Express.js, React, and node.js offers a powerful model for development projects that are scalable, efficient, and modular. One notable advantage of the MERN stack entails how companies, especially those in need of superior custom eCommerce website development services, could realize quick delivery of speedy, expandable websites loaded with tons of useful functions and tools. Nonetheless, utilizing the MERN stack might aid in the production of current and high-end solutions for contemporary web development.