Travel is full of moments that deserve more than a quick snapshot: stepping into a busy night market, hiking above the clouds, cycling beside the coast, diving into clear water, taking a train through unfamiliar scenery, or simply discovering a quiet street in a new city. While smartphones are convenient for everyday photos and short videos, they are not always the best choice for active, wet, fast-moving, or hands-free situations. That is where action cameras for travel become especially useful.
An action camera is small, lightweight, durable, and designed to capture wide-angle video in environments where carrying a larger camera would be inconvenient. It can fit in a pocket, attach to a backpack strap, mount on a helmet, sit on a mini tripod, or travel with you underwater in a compatible housing. For beginners, action cameras offer a simple way to record immersive travel memories without building a heavy and complicated camera kit.
This complete guide explains what to look for, which accessories matter, how to choose the right settings, and how to film and edit travel content that people will actually enjoy watching.
Why Choose an Action Camera for Travel?
The biggest benefit of action cameras for travel is freedom. You can record experiences while keeping your hands available for walking, climbing, carrying bags, steering a bike, or enjoying the moment. Their compact size also makes them easier to bring along than a larger camera system.
Action cameras are particularly useful for travelers who want to capture:
-
Hiking, trekking, camping, skiing, and other outdoor activities
-
Cycling, motorcycling, road trips, and public-transport journeys
-
Beach days, boating, snorkeling, swimming, and water sports
-
Walking tours, city exploration, food markets, and street scenes
-
Travel vlogs and first-person point-of-view videos
-
Family holidays, group activities, and spontaneous moments
-
Time-lapses of sunsets, busy streets, clouds, or scenic viewpoints
Unlike a phone, an action camera can be mounted in many ways. This allows you to capture a viewpoint that would otherwise be difficult to film. A chest-mounted camera can show your hands while kayaking. A backpack-strap mount can record a hike without requiring you to hold anything. A short handheld grip can help you create steady walking footage or speak directly to the camera.
Most action cameras are also built with active environments in mind. Depending on the model, they may offer water resistance, protective housings, rugged construction, image stabilization, and wide-angle lenses. These features make them practical for travel situations where a phone could be exposed to water, drops, dust, or vibration.
Choosing the Right Action Camera
The best action camera for travel is not automatically the most expensive camera available. The right choice depends on where you travel, what you want to film, how much gear you want to carry, and how comfortable you are with editing video.
Before buying, think about your typical trips. A traveler who mostly visits cities, museums, restaurants, and cafés may value portable size, ease of use, and good daytime footage. Someone who enjoys skiing, diving, mountain biking, or motorcycle touring may prioritize stabilization, durability, waterproof capability, secure mounting options, and extra batteries.
Here are the most important features to consider.
Video Resolution and Quality
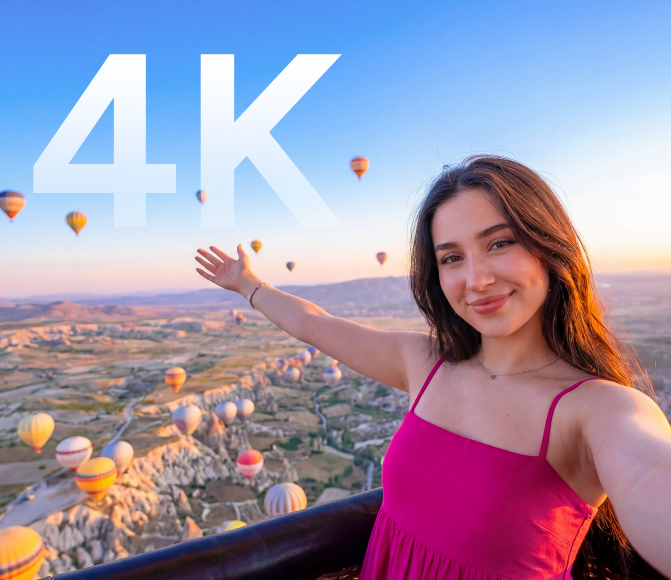
Video resolution describes how much detail a camera records. Many action cameras offer 4K video, which is a useful choice for travel content because it can capture detailed landscapes, architecture, food, and outdoor scenes. Recording in 4K also provides flexibility during editing, since you can crop clips or apply stabilization while still producing sharp Full HD video.
However, 4K uses more storage space and battery power than lower resolutions. If you plan to film long days, use smaller memory cards, or edit primarily on a phone, 1080p may be more practical. Full HD video can still look excellent on social media, YouTube, and personal travel videos when the lighting and shooting technique are good.
For beginners, a simple starting point is 4K at 30 frames per second for normal travel footage. This works well for walking tours, scenic landscapes, hotel reviews, travel narration, food experiences, and city exploration.
Frame Rate
Frame rate refers to the number of images recorded per second. It affects how smooth movement appears and whether you can slow footage down later.
For normal storytelling and everyday vlogging, 24 or 30 frames per second produces a natural look. If you plan to record fast activity—such as cycling downhill, skiing, surfing, or moving through crowded streets—50 or 60 frames per second can make motion appear smoother.
A higher frame rate is also useful for slow motion. For example, you might record a jump into a pool, a splash from a waterfall, a bird taking off, or waves crashing against rocks at 60 frames per second and then slow the clip down during editing.
Do not use a high frame rate for every shot simply because it is available. Higher frame rates need more light and use more storage. Choose them for moments where extra smoothness or slow-motion potential adds value.
Image Stabilization
Stabilization is one of the most important features in action cameras for travel. Since travelers often film while walking, riding, climbing, or holding the camera at arm’s length, raw footage can become shaky very quickly.
Electronic image stabilization reduces this shake and makes video more comfortable to watch. It can be especially helpful for walking tours, bike rides, handheld vlogs, and action scenes. Some stabilization systems slightly crop the image, so test the feature before your trip to understand how it changes the field of view.
Even with stabilization enabled, your filming technique matters. Walk smoothly, bend your knees slightly when moving, avoid sudden turns, and do not wave the camera around. Stabilization improves footage, but it cannot fully fix rapid, unpredictable movement.
Waterproofing and Durability
Travel often includes unexpected weather and wet environments. You may encounter rain, snow, sand, splashes, humidity, or water activities. Check whether your chosen camera is waterproof by itself or whether it needs a separate waterproof housing.
A waterproof housing can be necessary for snorkeling, diving, and other underwater use. Before going into water, inspect the housing seal, remove sand or hair from the gasket, and make sure every door is closed properly. A small mistake can allow water inside and damage the camera.
Durability also matters on land. A protective case, lens cover, and padded storage pouch can prevent damage when the camera is packed with keys, chargers, or other travel gear. If you are traveling in dusty, cold, or rugged conditions, choose equipment and accessories suited to those environments.
Battery Life and Storage
Video recording uses battery power quickly, especially in high-resolution modes. If your action camera uses removable batteries, carrying two or three extras is a smart travel decision. If the battery is built in, bring a reliable power bank and the correct charging cable.
Try not to wait until your battery is almost empty before charging. Airports, long train rides, hotels, cafés, and travel breaks are good opportunities to recharge.
Storage is equally important. Use a memory card designed for high-speed video recording, and choose enough capacity for your expected footage. A camera may record at a high resolution, but a slow or low-quality memory card can cause recording errors or missed clips.
For longer trips, bring more than one card rather than relying on a single large card. This reduces the risk of losing all your footage if a card becomes damaged or misplaced. Label your cards and store them in a small protective case.
Essential Travel Accessories
You do not need every accessory on the market. A small, carefully selected kit will cover most travel situations and keep your luggage manageable.
A handheld grip or mini tripod is one of the most versatile accessories. Use it for stable shots in hotel rooms, travel vlogs, group photos, time-lapses, and walking footage. A short grip also helps you keep the camera at a comfortable distance when speaking to it.
A backpack-strap mount is excellent for hands-free footage during city walks and hikes. It provides a natural perspective while keeping your camera accessible. For biking, skiing, or other active travel, a chest mount often produces a steadier point of view than a head mount because it moves less dramatically.
A selfie stick can help you capture wider scenes and group moments, but always check local rules. Some attractions, museums, stadiums, and protected natural sites may restrict selfie sticks, tripods, drones, or other recording equipment.
A practical beginner travel kit may include:
-
A high-speed memory card and one backup card
-
Extra batteries, a charging hub, or a power bank
-
A compact handheld grip or mini tripod
-
A backpack-strap mount
-
A chest mount for active adventures
-
A waterproof housing for water-based activities
-
A floating grip for swimming, snorkeling, or boating
-
A lens cloth and small protective case
-
A card reader or cable for transferring files to a phone, tablet, or laptop
Keep all small accessories in one labeled pouch. This habit makes it easier to find mounts, batteries, screws, adapters, and memory cards when you are moving between hotels or preparing for an early-morning activity.
Best Camera Settings for Beginners
You can produce strong travel videos without constantly adjusting complex settings. Begin with one dependable setup and change it only when the activity or lighting requires a different approach.
For general travel use, try recording in 4K at 30 frames per second with stabilization enabled. This setting is suitable for most daytime travel scenes, including walking through neighborhoods, visiting landmarks, recording food experiences, and sharing brief vlog updates.
For action-heavy situations, switch to 4K at 60 frames per second, or use the closest available higher-frame-rate option. This is helpful for cycling, skiing, vehicle rides, sports, and scenes you may want to slow down in your edit.
Use a wide-angle view when you want to include more of the landscape or surroundings. Wide framing works well in small spaces, narrow streets, mountain viewpoints, and vehicles. However, ultra-wide views can make objects near the edge of the frame appear distorted. Keep faces, buildings, and important details closer to the center when possible.
Lighting deserves special attention. Action cameras usually perform best in daylight because their compact size limits the space available for a larger image sensor. In low light, move more slowly, hold the camera steady, avoid rapid panning, and use existing light sources such as street lamps, shop windows, restaurant lighting, or vehicle interiors.
A clean lens is essential. Before filming, check for fingerprints, water drops, sunscreen, dust, and smudges. A five-second lens check can make the difference between a clear travel memory and a clip that cannot be repaired later.
How to Film Better Travel Videos
A memorable travel video is not made by recording every minute of the trip. It comes from collecting clips that communicate a sense of place, movement, and personal experience.
Start with an establishing shot. Film the airport sign, train platform, hotel exterior, trailhead, street name, landmark, or coastline. This quickly tells viewers where the next part of the story takes place.
Then capture a mixture of shot types. Wide clips show the environment, while close details make the destination feel more personal. Record the texture of local food, a hand opening a map, a train ticket, a shop display, footsteps on a trail, or water moving over rocks. These smaller details can make a simple travel video feel much more cinematic.
When filming while walking, keep your movements deliberate. Hold the camera steadily, look where you are going, and avoid rapid side-to-side motion. Let each clip run for at least several seconds. Short clips can work, but if every shot lasts only one second, editing becomes difficult and the finished video can feel rushed.
If you speak to the camera, keep your comments natural and focused. Explain where you are, what you are about to do, what surprised you, or why the moment matters. You do not need to narrate continuously. Leaving space for local sounds—waves, traffic, birds, music, market conversations, or footsteps—helps viewers feel present.
For hands-free activities, point-of-view footage can be especially effective. A chest mount can show your hands and equipment while paddling a kayak, preparing food, riding a bike, or setting up a campsite. A backpack mount can record a hike while allowing you to enjoy the scenery without holding a camera.
Organizing and Editing Travel Footage
A little organization during your trip saves a great deal of time later. At the end of each day, transfer your best footage to a phone, tablet, laptop, portable drive, or cloud service when you have a reliable connection. Do not keep your only copy of important travel memories on a single memory card.
Organize files by date and location. Names such as “Day 1 – Arrival,” “Day 3 – Mountain Hike,” or “Day 6 – Old Town Food Tour” make it easier to find clips after returning home. Remove accidental recordings and obviously unusable clips so they do not overwhelm your storage.
When editing, focus on the story. A simple structure is often enough:
-
Introduce the location, plan, or activity.
-
Show the journey or preparation.
-
Highlight the most interesting experience.
-
Include your reaction, result, or a useful takeaway.
-
Close with a final view, memorable moment, or short reflection.
Avoid trying to include every clip. Choose the shots that best communicate the mood and key events of the day. Add music carefully, but do not let it overpower dialogue or environmental audio. Use natural sound strategically; it often gives travel content more personality than music alone.
Final Thoughts
Action cameras for travel make it easier to record places and experiences from perspectives that smartphones and larger cameras cannot always capture. They are compact, flexible, capable of hands-free filming, and well suited to active trips, city exploration, outdoor adventures, and water-based activities.
As a beginner, focus on the basics: choose a camera that is easy to use, bring enough batteries and storage, use a few reliable mounts, keep the lens clean, enable stabilization, and record purposeful clips rather than nonstop footage. With practice, you can explore slow motion, time-lapses, underwater filming, cinematic color editing, and more advanced storytelling techniques.
If you want a compact option for documenting trips and adventures, consider the SJCAM C400 action camera. Its action-camera format makes it a practical choice for travel vlogging, point-of-view footage, hands-free mounting, outdoor activities, and everyday travel memories. Pair the SJCAM C400 with a stable mount, extra power, and thoughtful filming habits to create travel videos that are easy to share—and even better to revisit years later.